First off... a quick apology for the lengthy time between posts. I was sick again, in the hospital again and it just sucked all the energy from me, again.
I have been sewing, just not quite at the pace that I would like. I don't have as many pictures as I would like. Mostly due to the energy thing. However, if I wait until I'm all better we may never see another blog post! SO without further ado
You saw a peek at these two shirts in my last blog post
In the Sketchbook- September 2016.
 |
| My green floral silk top with ribbon V neckline and vintage green buttons. |
This shirt has history! I first posted about this shirt back in June 2016 in
this post. You can see pictures off all the pattern changes and how they compare to the original pattern. Since that post I have been in the hospital 2 more times, each for a week and each time losing more weight. I first made my first muslin of this shirt almost exactly one year ago. Crazy to think that the very first muslin I made of this shirt was done almost exactly one year ago!
This shirt has some very lovely details and I really wanted to re-create this shirt on me! The actual original pattern was drafted quite well and went together easily. Well, as easily as any Cynthia Guffey pattern. Her patterns are not for beginners, these are geared to advanced sewists who are looking for more advanced details and construction techniques. The problem with this shirt on me is that is was not drafted for my body shape. Basically Sarah and I redrafted this pattern on me to fit me. I think that every single seam line has at some point been altered for a better fit on my body.
The real kicker here is that I'm still not happy with it. It needs a slight bit of tweaking at the back armhole and across the back. In the green floral it just pulls ever so slightly. However, it is quite evident on the orange silk twill shirt. I can feel the tightness and you can see the pull wrinkles after being worn all day. The issue is much more more pronounced on the orange version which leads me to believe that it is directly related to the the sleeve. On the orange version I have 3 layers of sleeve with one of them being a stay of silk organza with no give. The green floral only has 2 layers ( the outer sleeve and the facing) and it only has a slight pull and much more give. A definite question to ask during a mentor session with Sarah Veblen.
 |
| You can see the in the top Green/floral version that the pull lines are only when I bring my arms all the way forward. In the bottom photos of the orange version you can see the bad pull lines from the bottom back armhole. Not pretty! |
It also need to be lengthened just a tad, maybe about an inch. If i were to stand and put my arms up say to reach an upper cabinet or to put a bag in an overhead bin on the airplane you would be able to see my tummy and I do not like that. So for these two shirts it is just something that I am aware of and I can always wear a bodysuit underneath and not worry about any indecent exposure! I really wanted to make a version out of a piece of liberty of London fabric that I have been saving but. However, i need to add just a tad more room to the CB in the mid-upper back for this next version along with a little more length.
 |
| Just a tad more length needed!sorry for the baggy jeans... |
I also changed the neckline. Many of Cynthia Guffey's patterns have quite a modest jewel neckline that does not look good on more nor am I comfortable in. I have re-designed the neckline into 2 different versions. The orange version is very similar to the original design only the 'U' neckline was deepened by almost 2 inches. keeping the relative same shape allowed me to use the same type of collar design that Cynthia drafted for this pattern. The green floral shirt I changed to a soft V neckline. This is one of my favorite types of necklines, very flattering on my body.
Even though this shirt has taken quite a while to get done, and sometimes caused me to lose patience, I am glad that I stuck with it! It was a good learning experience.
For the green floral V neckline I choose to use a gathered ribbon for the neckline treatment. This broke up the floral expanse and gives the eye a place to rest. I am in the middle of constructing a ling green wool pencil skirt to pair with this top. It also goes quite well with a casual pair of jeans. My husband likes this shirt but thinks my floral fabric choice is a little old fashioned. pfft. I disagree.
 |
| I always like to give my necklines the bend over test! Especially if they are a garment that I am considering to wear for work! |
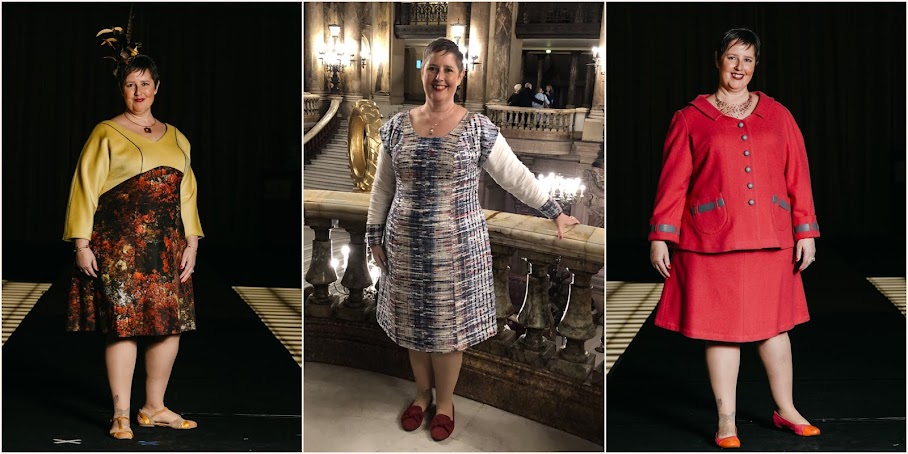
The orange shirt was born out of the idea that I needed to make a garment for the Chicago Chapter fashion show and Luncheon fabric challenge entry. We had a small amount of the challenge fabric and I happened to have the pattern sitting out waiting to be made up again with the neckline changes.
 |
| The 8 garment entries for the ASG Chicago chapter annual luncheon and fashion show. |
This was the perfect opportunity to practice the pattern again while combining several fabrics for the challenge. I started by sketching several ideas and this was the final outcome. I must say that inserting flat piping between to ruched layers was so very much not fun. I used quite a few creative words and gained valuable one on one time with my seam ripper. sigh. I decided that each piped seam only got 2 chances. After that I just made up my mind to be good with it and allow it to not be perfect. I even hand-basted those suckers and it still was off...
 |
| Final details of the orange shirt. The challenge fabric was the print and I used orange silk twill for the main pieces and blue silk for the flat piping. The buttons are vintage plastic from my button collection. I also finished the facings with a hong-kong finish using the challenge print fabric. |
Anyway, I realized that I now had this nice top but literally nothing to wear with it. I mean nothing. My fabric collection had this lovely deep maroon rayon ponte that went with my color scheme perfectly. I used my straight skirt master pattern, for wovens, and went about creating a master pencil skirt for knits. At the center front and center back I placed the fold off the edge at half an inch. effectively reducing the circumference by 2 inches which was perfect for a knit. I also pegged the side seam in an inch at the hem.I basted the side seams and tried on for fit. I may have taken in the side seams about an additional 1/4 inch for a total of 3 inch reduction in circumference, This worked great for a stable knit pencil skirt. I serged all the seams and topstitched all my seams in orange to coordinate with the top.
 |
The green shirt with the wool fabric currently being turned into a skirt.
The orange shirt with the new maroon ponte pencil skirt. pay no mind to the awkward pose and face!! |
Happy Sewing!!
 |
| I leave you with the Princess blowing her nose (actually pretending too) then wading up the tissue and pulling out another. Wash, rinse and repeat until the entire box was empty! |